Easy Oatmeal Chocolate Chip Bars Chewy & Delicious
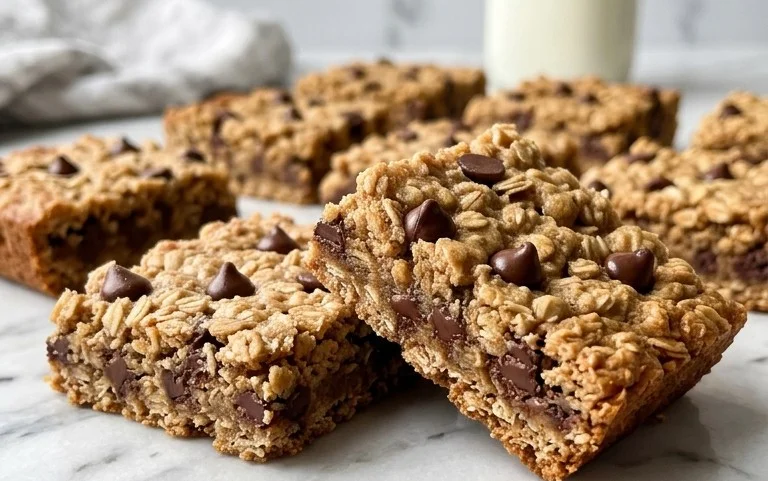
Oatmeal Chocolate Chip Bars are more than just a treat; they’re a hug in edible form. We all have those comfort foods, the ones that instantly transport us back to simpler times, and for so many of us, these bars are exactly that. Imagine the perfect balance: chewy, wholesome oats forming a sturdy yet yielding base, studded with generous pockets of melted, decadent chocolate. It’s the ultimate marriage of texture and flavor, satisfying both our sweet tooth and our desire for something a little more grounding.
Why We Adore Them
What makes these Oatmeal Chocolate Chip Bars so universally loved? It’s their incredible versatility! They’re perfect for a quick breakfast on the go, a satisfying afternoon snack, or even a delightful dessert after dinner. They’re wonderfully forgiving, meaning even if you’re new to baking, you can whip up a batch with confidence. The delightful aroma that fills your kitchen as they bake is reason enough to make them a staple. These aren’t just any cookies in bar form; they’re an upgraded classic, designed for maximum enjoyment with minimal fuss.
The Secret to Their Perfection
The magic of these Oatmeal Chocolate Chip Bars lies in achieving that exquisite chewiness without being dry or crumbly. We’ve perfected a method that ensures every bite is a harmonious blend of tender oats and gooey chocolate chips. Get ready to discover your new go-to recipe for a truly unforgettable treat.
Oatmeal Chocolate Chip Bars
There’s something incredibly comforting about a warm, chewy oatmeal chocolate chip cookie. But sometimes, the idea of scooping individual cookies feels like a lot of effort, especially when a craving strikes. That’s where these Oatmeal Chocolate Chip Bars come in. They deliver all the delightful flavors and textures of your favorite cookie, but in a convenient, bake-and-cut format. Imagine a soft, chewy base packed with wholesome oats and studded with melty pockets of milk chocolate. These bars are perfect for a quick breakfast on the go, an afternoon pick-me-up, or a simple, crowd-pleasing dessert. They’re incredibly forgiving and come together with minimal fuss, making them a go-to recipe for busy days. Plus, they store beautifully, meaning you can have a delicious treat ready whenever the mood strikes.
Ingredients:
- 1 1/2 cups all purpose flour
- 1 teaspoon baking soda
- 1/2 teaspoon salt
- 1 teaspoon cinnamon
- 14 tablespoons unsalted butter, softened
- 3/4 cup packed brown sugar
- 1/2 cup granulated sugar
- 2 large eggs
- 1 teaspoon vanilla extract
- 3 cups quick cook oats (old fashioned oats will work here as well)
- 1 cup milk chocolate chips
Getting Started: Preparing Your Baking Station
Before we dive into the magic of creating these bars, it’s essential to get our kitchen prepped. Preheat your oven to 350°F (175°C). This consistent temperature is key for even baking. Next, prepare your baking pan. I like to use a 9×13 inch baking pan. To ensure your bars lift out cleanly and avoid any sticking nightmares, generously grease the pan with butter or cooking spray. For an extra layer of insurance and ease of removal, I highly recommend lining the pan with parchment paper, leaving an overhang on the sides. This allows you to simply lift the entire baked slab out of the pan once it’s cooled, making cutting a breeze. Make sure the parchment paper fits snugly into the corners.
Creating the Chewy Base
In a medium bowl, whisk together your dry ingredients: the all-purpose flour, baking soda, salt, and cinnamon. This step ensures that your leavening agents and spices are evenly distributed throughout the batter, preventing any pockets of bitterness or a less-than-ideal rise. Set this bowl aside.
In a large mixing bowl, or the bowl of your stand mixer fitted with the paddle attachment, cream together the softened unsalted butter, packed brown sugar, and granulated sugar. Creaming means beating them together until the mixture is light, fluffy, and pale in color. This process incorporates air into the batter, which contributes to the tender texture of the finished bars. Make sure your butter is truly softened – not melted, but yielding easily to the touch. This is crucial for achieving the right consistency.
Once the butter and sugars are well creamed, beat in the eggs, one at a time, ensuring each egg is fully incorporated before adding the next. Then, stir in the vanilla extract. The vanilla adds a wonderful depth of flavor that complements both the oats and the chocolate beautifully.
Combining and Incorporating the Goodies
Now it’s time to bring our wet and dry ingredients together. Gradually add the dry ingredient mixture to the wet ingredients, mixing on low speed until just combined. Be careful not to overmix at this stage, as overmixing can develop the gluten in the flour, leading to tougher bars. We want tender, chewy bars!
Once the flour mixture is mostly incorporated, gently fold in the quick cook oats and milk chocolate chips. A rubber spatula is perfect for this. Fold until the oats and chocolate chips are evenly distributed throughout the dough. Again, avoid overmixing. The dough will be thick and slightly sticky, which is exactly what we’re looking for. The quick cook oats will absorb moisture during baking, contributing to that signature chewy texture. If you’re using old-fashioned oats, they’ll provide a slightly chewier bite, which is also fantastic.
Baking and Cooling for Perfect Bars
Spread the thick dough evenly into your prepared 9×13 inch baking pan. Use your spatula to press it into an even layer, making sure to get it right into the corners. This even distribution will ensure your bars bake uniformly.
Place the pan in the preheated oven and bake for 25-30 minutes, or until the edges are golden brown and the center is set. You can test for doneness by inserting a toothpick into the center; it should come out with a few moist crumbs attached, but not wet batter. Be careful not to overbake, as this will result in dry, crumbly bars. The oats and chocolate chips will continue to cook slightly as the bars cool, so pulling them out when the center is just set is ideal.
Once baked, remove the pan from the oven and let the bars cool completely in the pan on a wire rack. This is a critical step! Trying to cut them while they are still warm will lead to a sticky mess and misshapen bars. Patience is key here. Allow at least 1-2 hours for them to cool down thoroughly. Once cooled, use the parchment paper overhang to lift the entire slab out of the pan. Transfer it to a cutting board and use a sharp knife to cut them into your desired bar size. Enjoy these delightful Oatmeal Chocolate Chip Bars!
Conclusion:
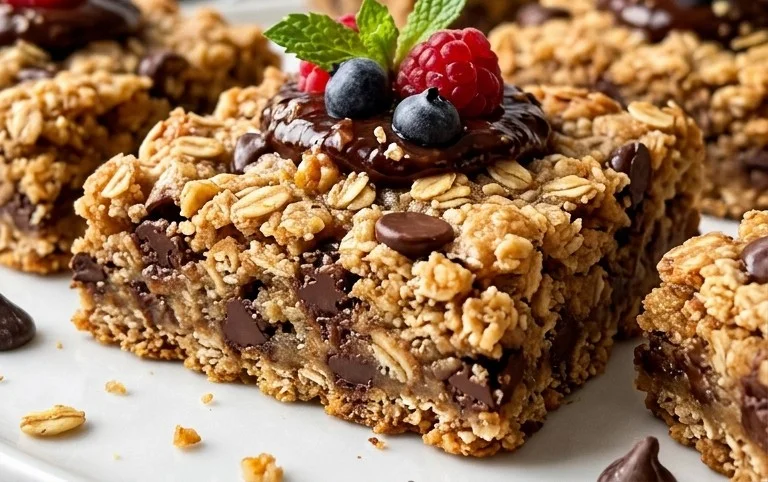
There you have it! These Oatmeal Chocolate Chip Bars are an absolute winner for so many reasons. They strike the perfect balance between chewy, soft oatmeal goodness and pockets of melty chocolatey delight. They’re incredibly versatile, making them ideal for a quick breakfast on the go, a satisfying afternoon snack, or even a comforting dessert. The beauty of this recipe lies in its simplicity and its ability to adapt to your personal tastes. I truly hope you give these Oatmeal Chocolate Chip Bars a try – I’m confident you’ll love them as much as I do!
For serving, these bars are fantastic on their own, but consider pairing them with a glass of cold milk for a classic treat. They also pair wonderfully with a hot cup of coffee or tea. If you’re feeling adventurous, try crumbling one over a bowl of vanilla ice cream or yogurt for an extra decadent experience.
Don’t be afraid to get creative with variations! You can easily swap out the chocolate chips for white chocolate, butterscotch, or even a mix of your favorites. Add-ins like chopped nuts (walnuts or pecans work beautifully), dried cranberries, or a sprinkle of cinnamon can elevate the flavor profile even further. The possibilities are endless!
Frequently Asked Questions:
Can I make these Oatmeal Chocolate Chip Bars ahead of time?
Absolutely! These bars are perfect for making ahead. Once cooled completely, store them in an airtight container at room temperature for up to 3-4 days, or in the refrigerator for up to a week. They also freeze wonderfully if you want to have them on hand for longer.
How do I prevent my bars from being too dry?
Ensuring your bars aren’t dry often comes down to not overbaking them. Keep a close eye on them in the last few minutes of baking. They should look slightly underdone in the center, as they will continue to set as they cool. Also, using fresh ingredients, especially softened butter, will contribute to a moister bar.
Oatmeal Chocolate Chip Bars
Chewy and delicious oatmeal bars loaded with chocolate chips, perfect for a sweet treat.
Ingredients
-
1 1/2 cups all purpose flour
-
1 teaspoon baking soda
-
1/2 teaspoon salt
-
1 teaspoon cinnamon
-
14 tablespoons unsalted butter, melted
-
3/4 cup packed brown sugar
-
1/2 cup granulated sugar
-
2 large eggs
-
1 teaspoon vanilla extract
-
3 cups quick cook oats
-
1 cup milk chocolate chips
Instructions
-
Step 1
Preheat oven to 350°F (175°C). Line a 9×13 inch baking pan with parchment paper, leaving an overhang on the sides. -
Step 2
In a large bowl, whisk together the flour, baking soda, salt, and cinnamon. -
Step 3
In a separate bowl, combine the melted butter, brown sugar, and granulated sugar. Mix until well combined. -
Step 4
Beat in the eggs one at a time, then stir in the vanilla extract. -
Step 5
Gradually add the dry ingredients to the wet ingredients, mixing until just combined. Stir in the oats and chocolate chips. -
Step 6
Press the dough evenly into the prepared baking pan. -
Step 7
Bake for 20-25 minutes, or until the edges are golden brown and the center is set. -
Step 8
Let cool completely in the pan before cutting into bars.
Important Information
Nutrition Facts (Per Serving)
It is important to consider this information as approximate and not to use it as definitive health advice.
Allergy Information
Please check ingredients for potential allergens and consult a health professional if in doubt.