Pumpkin Cheesecake Truffles-Fall Delight
Pumpkin Cheesecake Truffles are the ultimate fall indulgence, aren’t they? If you’re anything like me, the arrival of autumn instantly conjures cravings for warm spices and creamy desserts. And when you combine the rich, tangy goodness of cheesecake with the comforting hug of pumpkin spice, you’ve got a winning combination. These delightful little bites capture all the best elements of a classic pumpkin cheesecake, but in a perfectly portioned, no-bake, and incredibly easy-to-make package. Forget fussing with water baths and tricky crusts; these Pumpkin Cheesecake Truffles deliver all the flavor with minimal effort. They’re a crowd-pleaser, a perfect party favor, and an irresistible treat for yourself on a cozy evening. Get ready to fall in love with these little gems!
Why You’ll Love These
People adore these Pumpkin Cheesecake Truffles because they are a sophisticated yet simple way to enjoy the season’s quintessential flavors. They offer the luxurious texture of cheesecake and the beloved taste of pumpkin pie spices in a single, delightful mouthful. What makes them truly special is their versatility – they’re perfect for holiday gatherings, as a sweet ending to a fall feast, or simply as a pick-me-up treat on a chilly afternoon. Plus, the fact that they’re no-bake makes them incredibly accessible for home bakers of all skill levels.
Ready to Make Them?
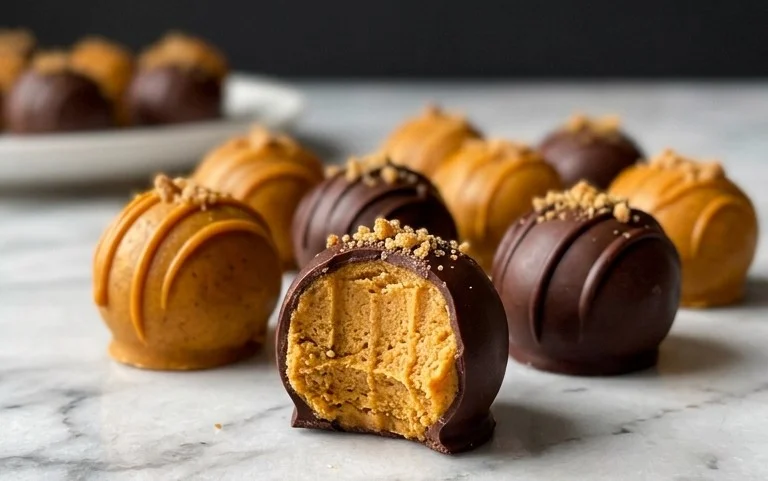
Indulge in These Adorable Pumpkin Cheesecake Truffles!
There’s something truly magical about the fall season, and for me, it’s inextricably linked to the comforting flavors of pumpkin and the rich indulgence of cheesecake. This year, I decided to combine those two beloved treats into something utterly delightful and surprisingly easy to make: Pumpkin Cheesecake Truffles! These little bites of heaven are perfect for holiday gatherings, a sweet afternoon pick-me-up, or just because. They offer all the creamy, spiced goodness of pumpkin cheesecake in a perfectly portioned, bite-sized package. The best part? They’re incredibly versatile and can be customized to your heart’s content. Let’s get baking!
Ingredients:
- 1 tablespoon butter
- 4 ounces cream cheese, softened at room temperature
- 1/2 cup canned pumpkin puree (make sure it’s 100% pure pumpkin, not pumpkin pie filling)
- 1 (14-ounce) can sweetened condensed milk
- 1 1/2 teaspoons pumpkin pie spice
- 1/2 cup graham cracker crumbs
- 1/3 cup white chocolate chips
- Orange food coloring (or red and yellow food colorings), as needed, optional
- Granulated sugar, as needed, for rolling
- Chocolate chips, for topping
Crafting the Pumpkin Cheesecake Base
The foundation of these delicious truffles is a rich and creamy pumpkin cheesecake mixture. Starting with softened cream cheese is crucial. It ensures that all the ingredients blend together smoothly, preventing any lumps and resulting in a velvety texture. If your cream cheese is still cold, you can speed up the softening process by microwaving it in very short bursts (5-10 seconds), but be careful not to melt it.
In a medium bowl, combine the softened cream cheese and the tablespoon of butter. Beat them together with an electric mixer (or vigorously with a whisk) until they are light, fluffy, and completely smooth. This initial creaming step is important for incorporating air, which contributes to the overall texture of the truffles.
Next, add the 1/2 cup of canned pumpkin puree. Again, ensure you are using pure pumpkin puree and not pre-spiced pumpkin pie filling, as that would throw off the spice balance. Stir this in until it’s well incorporated with the cream cheese mixture. The mixture will start to take on that beautiful autumnal orange hue.
Now, it’s time to introduce the sweetness and the enchanting pumpkin pie spice. Gradually pour in the entire can of sweetened condensed milk while continuing to mix. This liquid ingredient will help bind everything together and create a wonderfully rich and dense base. Follow this with the 1 1/2 teaspoons of pumpkin pie spice. You can adjust the amount of spice to your preference; a little more can be nice if you love a strong spiced flavor, or slightly less if you prefer a milder hint. Mix thoroughly until all the spices are evenly distributed throughout the pumpkin cheesecake mixture.
Finally, for the base, we’ll add the graham cracker crumbs. These crumbs act as a binder and also add a subtle textural contrast to the smooth filling. Stir in the 1/2 cup of graham cracker crumbs until they are fully incorporated. The mixture should now be quite thick, almost like a very stiff dough or a thick cookie batter.
Chilling and Shaping the Truffles
This is where the magic starts to solidify! To make shaping the truffles easier, it’s essential to chill the mixture. Cover the bowl tightly with plastic wrap and refrigerate for at least 2-3 hours, or until the mixture is firm enough to roll into balls. You can even make this mixture the day before and chill it overnight. The colder the mixture, the less it will stick to your hands.
Once the pumpkin cheesecake mixture is well chilled and firm, you can begin shaping your truffles. You can use a small cookie scoop or two spoons to portion out the mixture, or simply use your hands. If using your hands, a slight dusting of powdered sugar can help prevent sticking, though it’s not usually necessary if the mixture is sufficiently chilled. Roll the mixture into small, bite-sized balls, about 1 inch in diameter. Place these rolled truffles on a parchment-lined baking sheet.
Optional Color and Coating
For an extra festive touch, you can tint your truffles. If you want a vibrant orange color, add a few drops of orange food coloring to the pumpkin cheesecake mixture *before* chilling and rolling. Alternatively, you can mix red and yellow food colorings to achieve your desired shade of orange. Stir the food coloring in thoroughly until the color is uniform. If you prefer a more natural look, you can certainly skip this step – the natural color of the pumpkin is lovely on its own!
Preparing for the Finishing Touches
Now that your truffles are shaped and ready, it’s time to prepare for the final flourishes. In a small microwave-safe bowl, place the 1/3 cup of white chocolate chips. Microwave in 30-second intervals, stirring well between each interval, until the white chocolate is completely melted and smooth. Be very careful not to overheat white chocolate, as it can seize up and become unusable. You can also melt it in a double boiler if you prefer.
Once the white chocolate is melted, you have a few options for finishing your truffles. You can dip them entirely in the melted white chocolate for a classic truffle look. If you do this, you might want to use a fork to lift them out and allow any excess chocolate to drip back into the bowl. Another option is to drizzle the melted white chocolate over the truffles for a more rustic appearance. You can also melt some regular chocolate chips separately and use that for drizzling or dipping for a contrast in color.
Rolling in Sugar and Final Toppings
For a delightful textural element and a touch of sweetness, you can roll your chilled truffles in granulated sugar. This step is best done *before* dipping or drizzling with chocolate. Simply place some granulated sugar in a shallow dish, and gently roll each truffle in the sugar until it’s lightly coated. This adds a subtle sparkle and a pleasant crunch.
Once your truffles are dipped or drizzled with melted chocolate, and if you’re using any additional toppings like more chocolate chips (melted and drizzled, or even mini chocolate chips for decoration), now is the time. If you chose to dip the truffles, place them back on the parchment-lined baking sheet to set. If you drizzled them, allow the drizzle to set before moving them. You can speed up the setting process by placing the baking sheet in the refrigerator for about 15-30 minutes, or until the chocolate is firm.
These Pumpkin Cheesecake Truffles are best enjoyed chilled. Store them in an airtight container in the refrigerator for up to a week. They make a wonderful homemade gift, a festive addition to any dessert table, or simply a decadent treat to savor. Enjoy!
Conclusion:
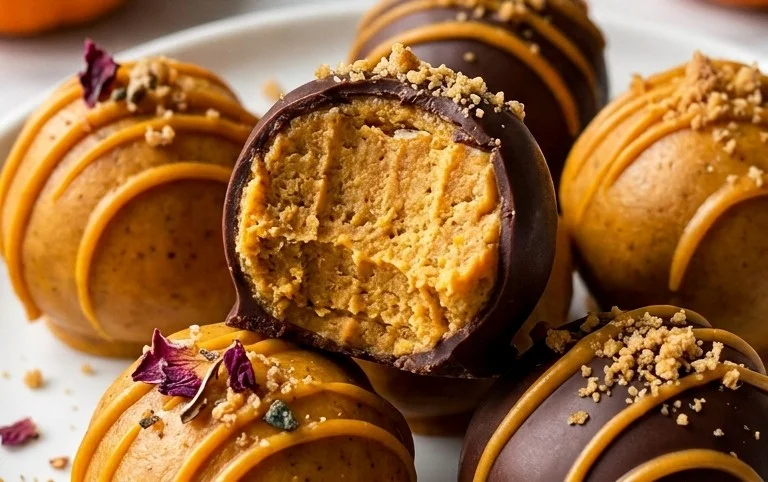
I hope you’ve enjoyed learning how to make these delightful Pumpkin Cheesecake Truffles! They truly are a fantastic treat, combining the creamy richness of cheesecake with the warm, comforting flavors of pumpkin and spice. These little bites are surprisingly easy to whip up, making them perfect for a quick indulgence or an impressive addition to any gathering. Their small size makes them incredibly versatile, and they disappear fast! I encourage you to give this recipe a try; I’m confident you’ll fall in love with them just as much as I have.
For serving, imagine these alongside a warm cup of coffee or tea, or as a sweet ending to a festive fall meal. They also make wonderful edible gifts, packaged in little cellophane bags tied with ribbon. If you’re feeling adventurous, consider adding a pinch of cardamom or a swirl of caramel sauce for an extra layer of flavor. You can even experiment with different nuts, like chopped pecans or walnuts, mixed into the coating for added texture.
Frequently Asked Questions:
Can I make these Pumpkin Cheesecake Truffles ahead of time?
Absolutely! These truffles can be made up to 2-3 days in advance and stored in an airtight container in the refrigerator. This makes them a perfect make-ahead dessert for parties or holidays.
What’s the best way to store leftover truffles?
Store any remaining Pumpkin Cheesecake Truffles in an airtight container in the refrigerator. They’ll stay fresh and delicious for several days. If they’re coated in chocolate, you can also store them at cool room temperature for a day or two, but refrigeration is best for longer storage.
Can I use cream cheese that isn’t full-fat?
While full-fat cream cheese provides the best texture and richness for these truffles, you can experiment with reduced-fat cream cheese. Be aware that it might result in a slightly softer consistency, so you might need to chill the mixture for a bit longer before rolling into balls.
Pumpkin Cheesecake Truffles
Decadent no-bake pumpkin cheesecake truffles rolled in graham cracker crumbs and topped with chocolate chips.
Ingredients
-
1 tablespoon butter
-
4 ounces cream cheese, softened
-
1/2 cup canned pumpkin puree
-
1 (14-ounce) can sweetened condensed milk
-
1 1/2 teaspoons pumpkin pie spice
-
1/2 cup graham cracker crumbs
-
1/3 cup white chocolate chips
-
Orange food coloring (optional)
-
Granulated sugar, for rolling
-
Chocolate chips, for topping
Instructions
-
Step 1
In a large bowl, cream together the softened cream cheese and melted butter until smooth. -
Step 2
Stir in the canned pumpkin puree, sweetened condensed milk, and pumpkin pie spice until well combined. -
Step 3
If using, add orange food coloring to achieve desired color and mix thoroughly. -
Step 4
Gently fold in the white chocolate chips and graham cracker crumbs. -
Step 5
Chill the mixture in the refrigerator for at least 1 hour, or until firm enough to roll. -
Step 6
Roll the chilled mixture into small balls and then roll them in granulated sugar. -
Step 7
Melt the chocolate chips and drizzle over the truffles, or dip the bottoms. -
Step 8
Refrigerate the finished truffles until the chocolate has set.
Important Information
Nutrition Facts (Per Serving)
It is important to consider this information as approximate and not to use it as definitive health advice.
Allergy Information
Please check ingredients for potential allergens and consult a health professional if in doubt.